diy

DIY glitter tree tutorial

Yep, I'm obsessed with decorating for Christmas. And thanks to last week's project, I had some extra gold glitter paper just sitting around so I figured I'd make something with it! You can make this with any thick paper you have (you know, in case you're not in love with glitter) and they literally take like 5 minutes. Maybe 10 if you cut really slowly. DIY 2 piece glitter christmas tree via courtney khail step 1

1. Grab your paper and your scissors

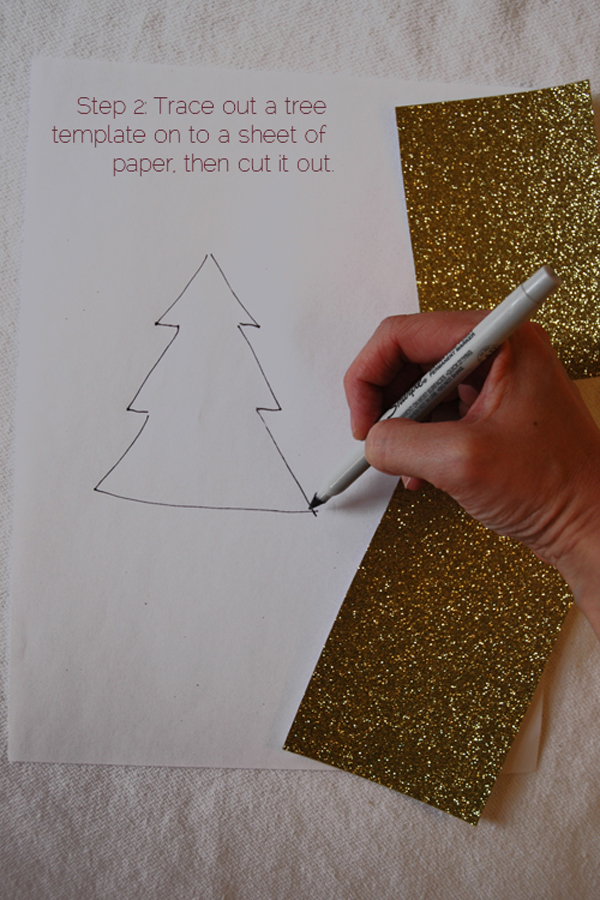
DIY 2 piece glitter christmas tree via courtney khail step 2

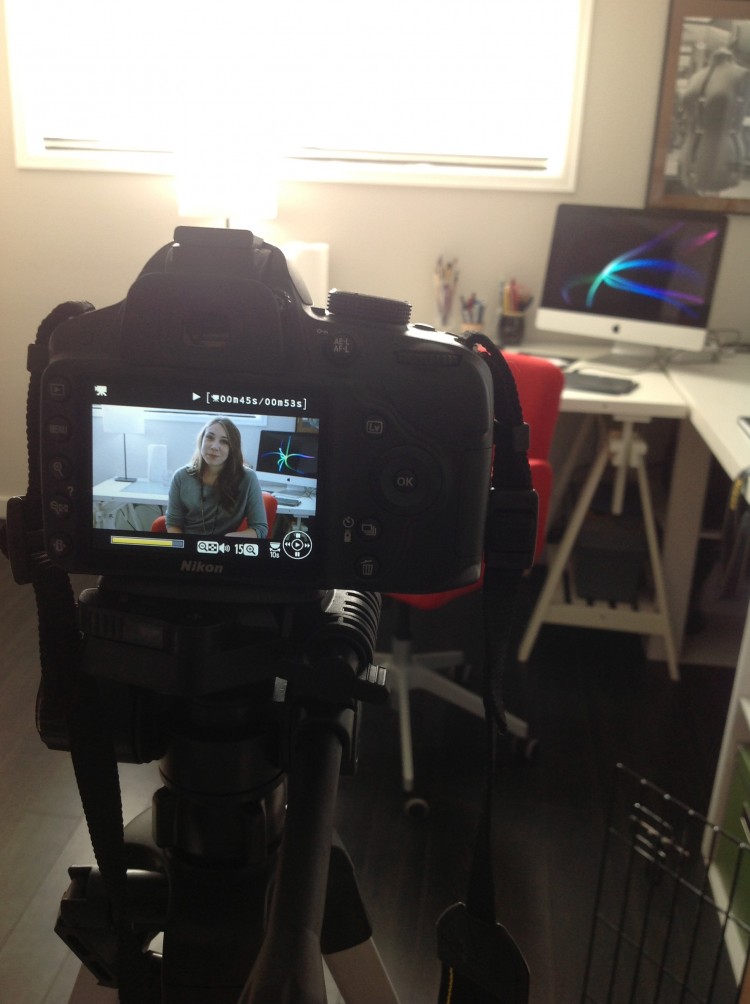
2. Draw out a Christmas tree (excuse the wonkiness. This is what happens when you try to draw while looking through a camera.)

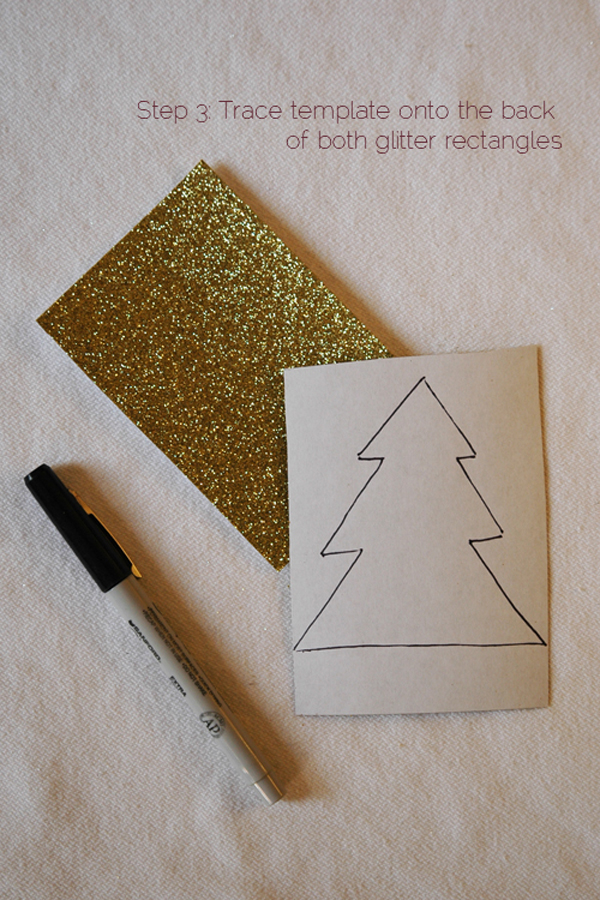
DIY 2 piece glitter christmas tree via courtney khail step 3

DIY 2 piece glitter christmas tree via courtney khail step 4

3-4. Cut out the first tree, trace it onto the second piece of paper, and then cut that out so you have two identical Christmas tree shapes (or if you're feeling fancy, you could do this whole tutorial with present shapes)

DIY 2 piece glitter christmas tree via courtney khail step 5

5. On one tree, cut from the top down about an inch. On the second tree, cut from the bottom up- stopping just a little more than an inch from the top.

DIY 2 piece glitter christmas tree via courtney khail step 6

6. Slide them together and adjust so they stand upright

DIY 2 piece glitter christmas tree via courtney khail step 7

7. Go have a cookie, pat yourself on the back for being so incredibly talented, and begin planning your future crafting empire. Or just eat the cookie.

from the studio: diy watercolor halloween cards

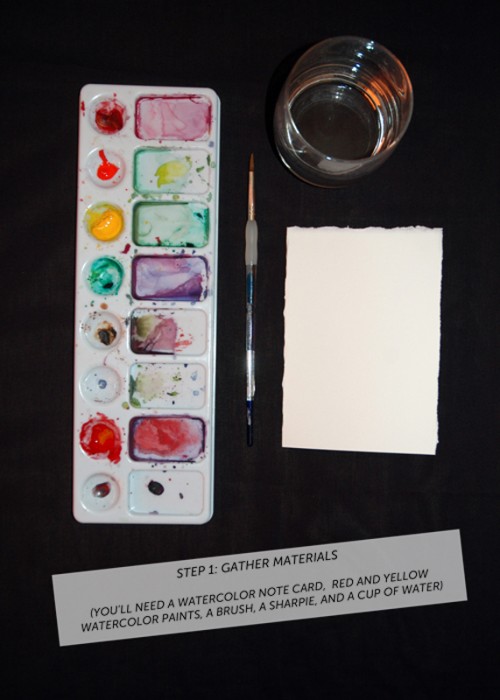
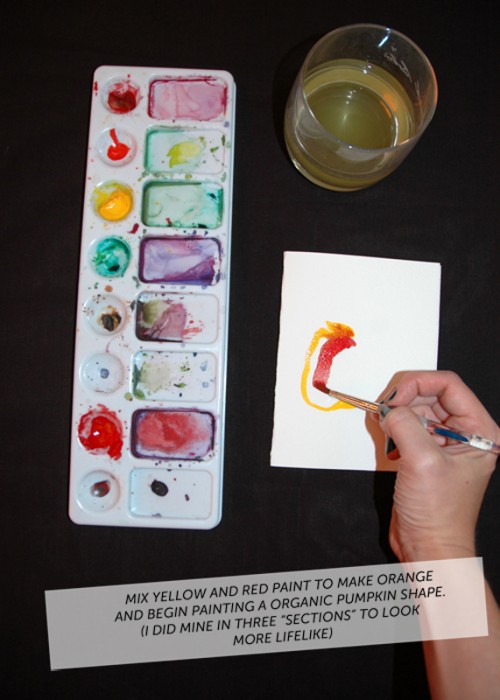
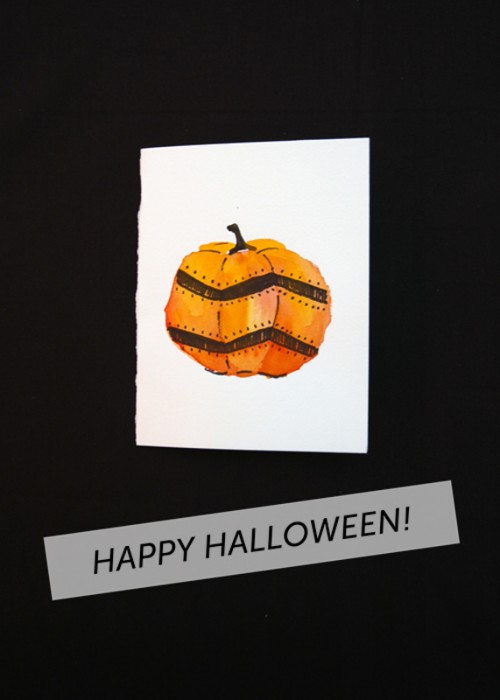
I'm kind of obsessed with sending mail (I'm guessing that doesn't come as a huge shock.) but seriously, nothing is better than receiving real mail that isn't a bill or an election flyer. That in mind, I wanted to share a super simple diy watercolor halloween card with you all today. Seriously, it's so easy that you could whip a few of these out today and have them in the mail for your friends to get by Wednesday. Or maybe even just whip up a few and put them in your neighbors mailboxes Wednesday morning to let them know you're excited to see them during trick-or-treating/at the party/etc. It's all about the little things! DIY halloween watercolor card1 via courtney khail

DIY halloween watercolor card via courtney khail

DIY halloween watercolor card via courtney khail

DIY halloween watercolor card via courtney khail

DIY halloween watercolor card via courtney khail

DIY halloween watercolor card via courtney khail

From the Studio: DIY Watercolor Shamrock Bouquets

St. Patrick's Day is just around the corner and given that I'm Irish (or partly- have a little French and English too) I've always loved the holiday. It may be because for as long as I can remember my dad, my sister, and me walked in the parade (complete with Irish American Heritage sashes on) as my mom waved from the sidelines. Or maybe it was because the whole day was filled with merriment, laughter, and good food (I for one love corned beef and cabbage with boiled potatoes.) Whatever it was, the day holds some of my fondest childhood memories and therefore still makes me all happy when it finally arrives. Because of that, I thought I'd play around with painting different compositions of shamrocks and share my favorite with you all. In the end, I created a shamrock bouquet (complete with a twine bow) for you all to share the luck of the Irish with your friends and family. Enjoy!

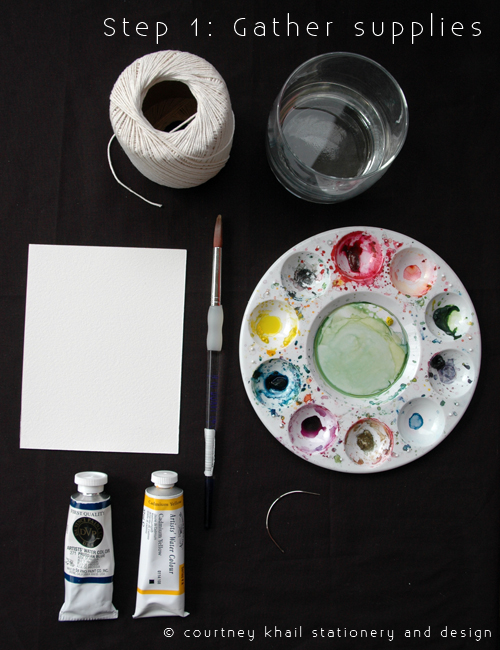
Step 1: Gather your supplies. You'll need blue and yellow paint (or just green if you want to take the easy way out,) water, a brush, a piece of watercolor paper, twine, yarn, or string, and a needle. I used an upholstery needle because the eye was large enough for my twine and the needle was sturdy enough to poke through the paper.

Step 2: Make green paint (by mixing yellow and blue together) and paint a shamrock. I know we all learned this in elementary school, but in case that was just my school, a shamrock is simply 3 (or 4) hearts connected together at their base. Let it fully dry before continuing. (This is when I did a load of laundry)

Step 3: Add some more yellow to the green paint (just to add some interest) and paint a second shamrock. Let dry (and if you're me, put the clean clothes in the dryer.)

Step 4: Add some more blue this time, and paint a third shamrock. Don't be afraid to let them overlap. It creates a really pretty layering affect.

Step 5: After everything is dry, thread your needle. Coming from the back of the card, poke the twine through the paper just to the left of the stems.

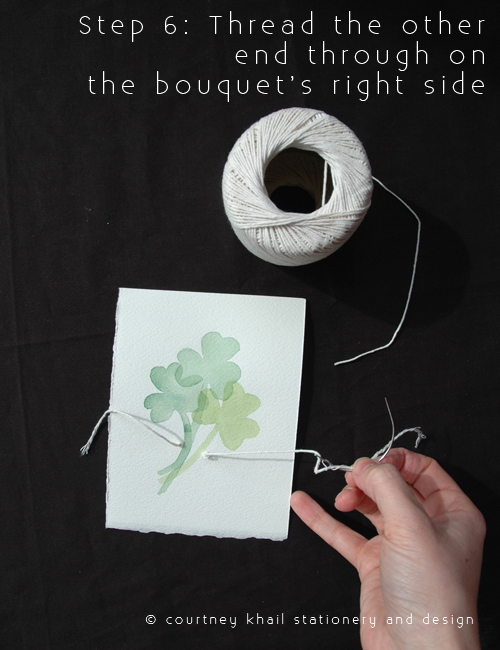
Step 6: Thread the other end of the twine and repeat- coming through on the right right of the stems.

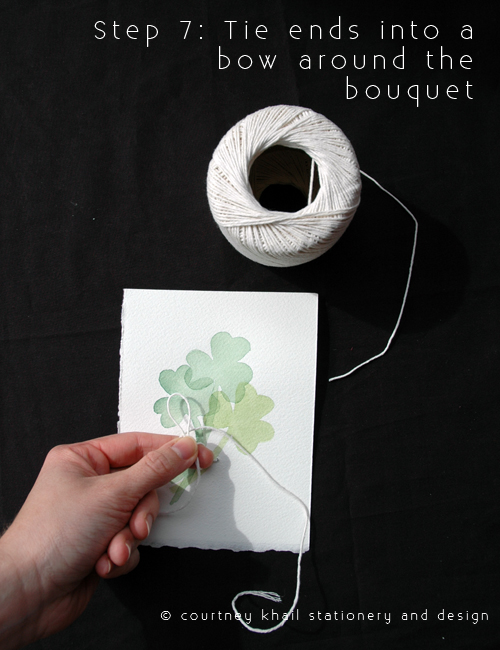
Step 7: Tie the two ends into a bow and cut any extra twine that may be there.

Step 8: Write a message and send off to someone who needs some luck. (Might I even suggest a gold or green envelope? Because that would make this even better. Oh! Or maybe package everything up and fill it with gold chocolate coins and rainbow colored shredded paper. The possibilities are endless...)

From the Studio: DIY Watercolor Valentine's

Every year I make my own Valentine's. Something about the glue and the glitter and the paint transports me back to the days of elementary school where every one makes a "Valentine Box" and gives EVERY single person in their class a card. (I know some people may think that it's annoying to have to give everyone a card, but I remember seeing how happy and surprised some kids were to get cards and it always made me smile.) And to be honest, unlike a lot of people, I love Valentine's Day. Not the whole "I have to buy you chocolates and a cheap card or else I don't love you" mentality sometimes adopted, but the idea that for one whole day you get to go overboard in showing how much you care about someone. Or someone's. My family is really big on Valentine's Day. Like wake up to a Valentine's Day celebration complete with presents before school kind of big. What can I say, we're saps when it comes to love. Anyhow, back to the point. Given that I make Valentine's every year, I thought I would show you all a creative (and really simple) way to make some for yourself. (I taught this trick to my Alt classes as a test run and it went really well so hopefully it does for you too!)

Step One: Get all of your stuff together. You'll need paper (I wanted an A2 sized card so my paper is 8.5"x5.5" but you can use whatever size you have) a watercolor brush, watercolor paint, a bone folder (or credit card. No reason to buy something you don't absolutely need) masking fluid and an old small paintbrush that you don't care if it gets ruined because it will. If you'd like to feel fancy, feel free to place some glittery hearts around- you know, for the mood.
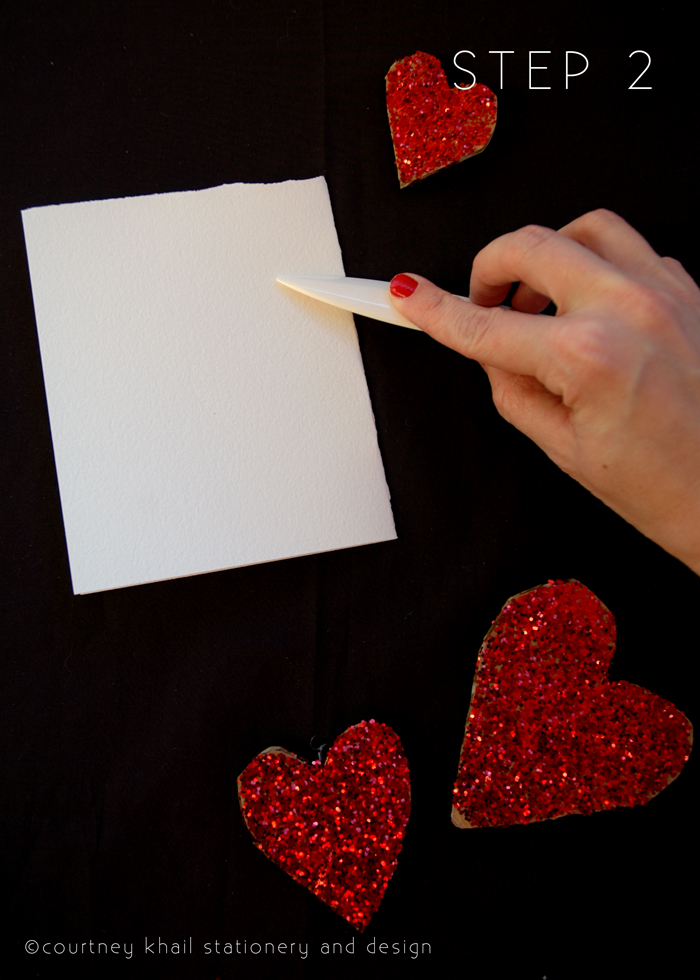
Step Two: Using your bone folder, fold your paper in half and crease the edges. I did a vertical fold, but horizontal would work well too.

Step Three: Using the brush you're going to ruin, paint a design on your paper using masking fluid. It doesn't need to be super thick, but you'll want to make sure the fluid makes a complete solid layer wherever you place it. I did X's and O's because my parents used to play tic tac toe over the phone when they were dating long distance and I always associate that with love and therefore Valentine's Day.

Step Four: After it has FULLY dried-test with the back of your hand never the front because it will leave oil behind and water and oil don't mix- combine a dime sized amount of watercolor paint with clean water and use that to paint over the entire design.

Step Five: Once the paint is completely dry, take a regular white eraser (or any eraser, I just like that you don't have to worry about color transferring with a white one) gently erase away the masking fluid. It should start acting a lot like rubber cement does when you rub that away. After the entire card is erased clean of masking fluid, dust off any left over residue.

Step Six: Step back and take a moment to admire your handiwork.

See? Super easy. And if you'd like, add some glitter, write a message inside and mail it off to a deserving loved one. I'd suggest in a pretty red or pink envelope because that makes it even more awesome to receive.

All photos copyright of courtney khail stationery and design. Feel free to re-post, but please give credit and be sure to link back to this post.

DIY picnic tote

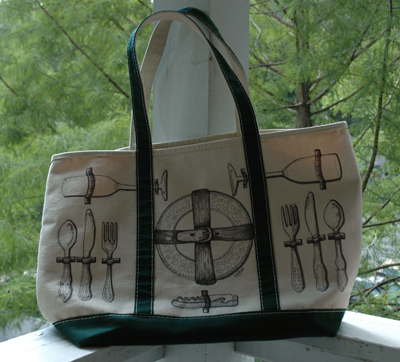
I'm huge fan of all the beautiful and unique picnic bags popping up lately, butcouldn't bring myself to buy another bag when I already own too many (I'm really working on the "less is more" philosophy.) Instead, I decided to take an old canvas tote I already owned and make it over. So here is how it turned out!

via personal collection

Step 1: Get a plain tote. This one (from LL Bean) used to be my grandmother's, but she handed it over to me awhile back because she never used it. Instead of taking off her initials (which I kind of like) I simply turned the bag around to the blank side. If you wanted though, you could pull out the seam ripper and go to town removing the monogram. I just didn't think it was necessary.

via personal collection

Step 2: Sketch out what you would like on the bag in pencil. I went with the whole "looking into an open picnic basket," but you could draw out wine bottles, loaves of bread, herbs...whatever you'd like. I'm a big proponent of drawing from life though, so I pulled out the mismatched flatware, the wine opener etc. to make sure everything would look close to how it should. (For me, this was most important for the buckle around the plates. I drew a blank when trying to remember what it should look like and had to bring out a belt!)

via personal collection

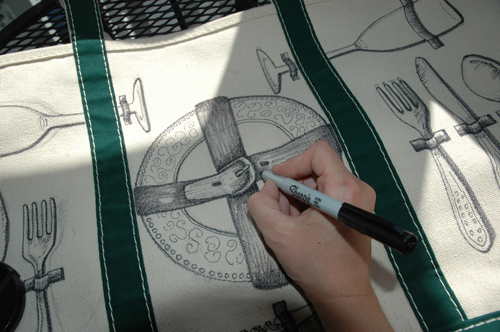
Step 3: Trace over your sketch with a Sharpie. You could probably use a fabric pen, but I didn't have one handy. (As an artist though, I always have sharpies around!) I decided to use two sizes- thick and thin- to create more depth in the objects. Pick where you'd like the light source to come from (thanks to studying scientific illustration, I almost always have it coming from the top left) and use the thick Sharpie on all of the areas that should have a shadow. For me, that meant I used it on the right side of my objects. Once that's done, use the thin Sharpie to finish the other parts and to add delicate details to the flatware, plates etc. I kept going and added more values to the straps etc, but that's not necessary. I just thought it made everything pop a little more!

Step 4: If you feel like it, erase your pencil marks. I didn't care if you could see the sketch so I didn't worry about it, but if it bothers you, feel free!

via personal collection

Step 5: Step back, marvel in your handiwork, and get to planning a picnic so you can show off your new bag! Hope you all enjoy!!