kim and courtney cook

kim and courtney cook: squash

Oh Fall. Crisp air, cute clothes, and of course, comfort food. Now is about the time that the farmer's markets are flooded with pumpkins and squashes, and pretty much every root vegetable imaginable, so it's no surprise that this month Kim and I decided to pick a very fall vegetable as our inspiration. (I went with an acorn squash because I think they are pretty and knew that it would be sitting out on my counter until I finally got around to making something from it. Two points for instant fall decorating in the kitchen!)

acorn squash via courtney khailhello beautiful squash via courtney khail

kim and courtney cook squash soup photo by kim taylor via courtney khailsquash soup via kimberly taylor

But let's get back to the comfort food. Something about cooler weather makes me crave hearty dishes. Ones that involve roasting, baking spices (cinnamon, nutmeg, allspice, etc.) and wilted leafy greens. Oh and cheese. Scratch that. I crave cheese all year round. But mostly, dishes that fill your home with amazing scents and make you feel like you're embraced. (Am I the only one who feels like certain foods just hug you with warmth?) And that's exactly the feeling I wanted this dish to have.

This dish is super simple to make. The hardest part is actually cutting the squash (it's dense like a pumpkin) but the rest is as easy as boiling water. All you do is roast and cube the squash, crisp some bacon (though sausage, chicken, or pretty much anything else would work,) brown some butter, and then add things that sound good to you (I used spinach to bring in some greens.) I was also going to top it with lightly toasted acorn squash seeds, but well, I got caught up with some show and burned mine. Whoops. After all that, you just serve it over pasta and top with pepper and cheese. No need to measure anything out really- just add what looks right to you. Our  house loves bacon so I upped that, but if you're more of a veggie person- add more vegetables. You could even throw on some toasted walnuts or something delicious like that. Whatever you do, don't over think it. Cooking should be fun, right?

Anyhow. Enough with the talking. Here are the recipes- (If you want to see my dish, it's up on my instagram account. Follow me at @ckhail)

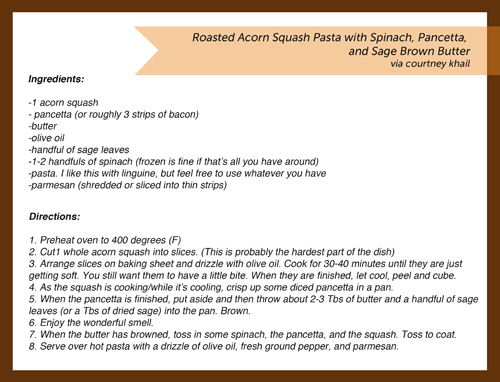
roasted acorn squash pasta with pancetta, spinach, and brown butter via courtney khail

and kim's soup! Make sure you head over to her site to see more as well.

Butternut Squash Soup

from epicurious.com

Vegetable oil spray

1 2-pound butternut squash, halved lengthwise and seeded

2 cups low-sodium chicken broth

1/2 teaspoon ground cinnamon

1/2 teaspoon dried marjoram

1/2 teaspoon dried thyme

Pinch of grated nutmeg

1 cup milk or half-and-half

Kosher salt and freshly ground black pepper

Preheat the oven to 375 °F. Spray a 9 x 13-inch baking dish with the vegetable oil spray.

Place the squash halves, cut side down, in the prepared dish. Pierce the skin sides several times with a fork. Bake until the squash is tender, about 45 minutes. Set aside until cool enough to handle.

Using a large spoon, scrape the flesh from the cooked squash into a food processor. Discard the skins. Add 1 1/2 cups of the chicken broth, the cinnamon, marjoram, thyme, and nutmeg and puree until smooth. Transfer the puree to a large saucepan. Whisk the milk into the soup over medium heat. If you prefer a thinner consistency, add the remaining broth. Season to taste with salt and pepper.

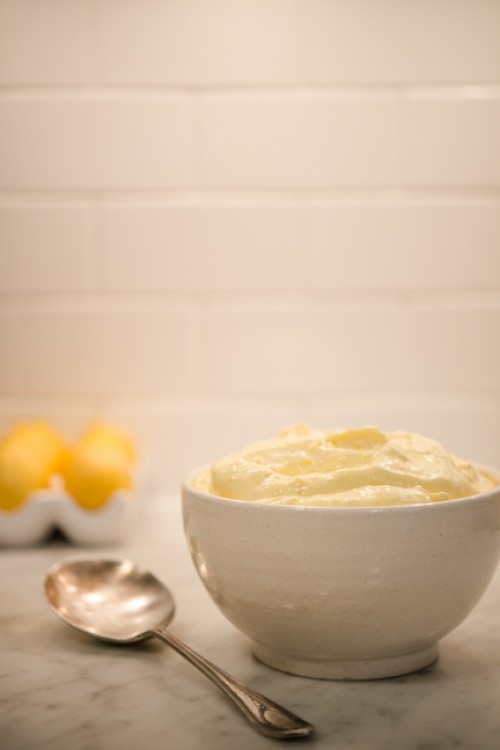
kim and courtney cook: lemons

watercolor via courtney khail

photograph via kimberly taylor

Well everyone, I'm back! We've officially moved in to our new place (and for the most part we're settled though we still have a lot of things to finish up,) J's studying for his boards (he takes them later this month) and slowly but surely we're learning the city. I'm still amazed that we live here and feel so lucky to be able to call Denver home!

All of that said, sorry for the delay in May's "kim and courtney cook." Both Kim and I were swamped last week and just couldn't get it all together. That said though, this month's was worth the wait! We decided on lemons and the recipes are awesome. I haven't tried Kim's (yet) but I'll go ahead and warn you that the cookie's I choose for my recipe are incredibly addictive. Hope you enjoy!

Lemon Ricotta Cookies (via here)

Side note-if you have limes as opposed to lemons, that works really well too.

Ingredients:

Cookies:

  • 2 1/2 cups flour
  • 1 teaspoon baking powder
  • 1 teaspoon salt
  • 1 stick softened, unsalted butter
  • 2 cups sugar
  • 2 eggs
  • 15 ounces of whole milk ricotta cheese
  • 3 Tbs of fresh lemon juice
  • The zest of one lemon (zest first, then juice. It will save you a lot of headache!)

The Glaze:

  • 1 1/2 cups confectioner's sugar
  • 3 tablespoons lemon juice
  • The zest of one lemon

Directions:

1. Preheat your oven to 375 degrees

2. Combine the flour, baking powder, and salt in a bowl and put to the side.

3. In another bowl (or a stand mixer) beat the butter and sugar until it's light and fluffy. Takes about 3 minutes. Add one egg at a time, allowing each one to incorporate before you add the next one. Next, beat in the ricotta cheese, lemon juice, and lemon zest until it's all combined.

4. Finally, stir in the dry ingredients.

5. Spoon the dough onto parchment lined baking sheets (roughly 2 Tbs per cookie) and bake for 15 minutes. (You can start making the glaze while they bake.) You'll know they are finished when they are slightly golden at the edges.

6. Take the cookies out of the oven and let them cool down for about 20 minutes

Glaze Directions:

1. Combine the confectioner's sugar, lemon zest and lemon juice in a bowl and stir until it's smooth and creamy. Spoon about 1/2 tsp of the glaze per cookie and smooth with the back of the spoon. After sitting for approximately 2 hours, the glaze will be nice and hardened and you can package them up. Or you can do like me and eat a few as soon as the glaze hits and then put the rest in the frig until they set.

And now for Kim's recipe:

Lemon Mousse (courtesy Ina Garten)

Ingredients

  • 3 extra-large whole eggs
  • 3 extra-large eggs, separated
  • 1 cup plus 2 tablespoons sugar
  • 2 teaspoons grated lemon zest
  • 1/2 cup freshly squeezed lemon juice (4 lemons)
  • Kosher salt
  • 1 cup heavy cream
  • 1/2 cup good bottled lemon curd, at room temperature
  • Sweetened Whipped Cream, recipe follows
  • Sliced lemon, for garnish

Directions:

In a large heat-proof bowl, whisk together the 3 whole eggs, 3 egg yolks, 1 cup sugar, the lemon zest, lemon juice, and a pinch of salt. Place the bowl over a pan of simmering water and cook, stirring constantly with a wooden spoon, for about 10 to 12 minutes until the mixture is thick like pudding. (I change to a whisk when the mixture starts to get thick.) Take off the heat and set aside for 15 minutes. Cover with plastic wrap directly on the surface and refrigerate for 1 to 2 hours, until completely chilled.

Place half the egg whites and a pinch of salt in the bowl of an electric mixer fitted with the whisk attachment. Beat on high speed. Add the remaining 2 tablespoons sugar and continue to beat until the whites are stiff and shiny. Carefully fold the beaten whites into the cold lemon mixture with a rubber spatula. Place the cream in the same bowl of the electric mixer fitted with the whisk attachment (no need to clean the bowl) and beat on high speed until the cream forms stiff peaks. Carefully fold the whipped cream into the lemon mixture. Fold in the lemon curd, and pour into a 7-inch-diameter, 3-inch-deep souffle dish. Decorate with sweetened whipped cream and lemon slices that have been cut into quarters. Chill and serve cold.

Sweetened Whipped Cream:

  • 1 cup cold heavy cream
  • 1 tablespoon sugar
  • 1/2 teaspoon pure vanilla extract

Directions:

Place the cream, sugar, and vanilla in the bowl of an electric mixer fitted with the whisk attachment. Whip on medium and then high speed until the cream just forms still peaks. Spoon the whipped cream into a pastry bag fitted with a large star tip.

See? I told you these were worth the wait. Make sure to pop on over to Kim's blog to see more of her photos as well as her take.

From the Studio: kim and courtney cook cauliflower

watercolor via courtney khail

photograph via kim taylor

For this month's Kim and Courtney Cook (see how it started here), I picked cauliflower (mostly because I had a head of it in the refrigerator and really wanted to try out a new soup) but little did I know how hard it is to actually paint and/or photograph cauliflower. Seriously, I'm lucky Kim is my friend because otherwise she probably wouldn't be speaking to me now otherwise.

Note to self, never pick a white food for an art project.

That said, I think we both did pretty well despite how difficult the subject matter seemed. Kim's photos rock as usual (see them all here) and the recipes are awesome. (I made this soup for two days straight, and then made another batch when the hubs had a dinner meeting. It's really that good.) Let us know what you guys think!

Cauliflower Soup

Cauliflower Soup

2 strips of bacon

1 small onion

2 garlic cloves (minced)

1 carrot

1/2 stalk of celery

1/2 head of cauliflower

1 Tbs extra virgin olive oil

1/2 Tbs parsley

1/2 Tbs thyme

2 cups stock (I used beef, but chicken would be fine)

2 Tbs butter

2 cups half and half (or milk)

3 Tbs flour

1/4 cup Parmesan

salt and pepper

Directions:

1. Cut up bacon and cook in soup pot (I used a Dutch Oven, but anything that can hold soup would be fine.) Remove and wipe out the pan. (You don't have to wipe it all out, you just want to get some of the fat out so you can feel like this is "healthy.")

2. Dice onion, carrot, and celery

3. In the same pot as the bacon was cooked in, cook the onion in olive oil until translucent.

4. Add carrots and celery and cook another 5ish minutes

5. Add cauliflower, parsley and thyme and cook for 15ish minutes

6. Pour in stock, bring to a boil and then simmer.

7. Meanwhile, in a sauce pan melt the butter.

8. In a small bowl, whisk flour into 1 cup of half and half, then whisk the mixture into the melted butter.

9. Remove from the heat and whisk in remaining cup of 1/2 and 1/2.

10. Once it's all whisked together an there aren't any lumps, add to the soup

11. Simmer 15-20 minutes, then season with salt and pepper.

12. Pour into bowls and serve with toasted Italian bread and a side salad

If you like silky soups (or have a sore throat and just want something soothing) you can blend it until it's the consistency that you'd like. Promise it tastes just as amazing both ways.

Enjoy everyone!

From the Studio: kim and courtney cook beets

watercolor by Courtney Khail

photograph by Kimberly Taylor

As you've probably noticed, today's from the studio is a little different than the rest. That's because today is the first day of a new monthly collaboration called "kim and courtney cook" between me and Kim of Kimberly Taylor Images. I met Kim at Alt this year and right away it felt like I'd known her for years. I could go on and on about how awesome she is (because really, she rocks) but this is already going to be a long post, so I'll get to the main things you need to know. One- she is an extremely talented photographer. Like, REALLY REALLY talented. Two- she loves to cook (and looking at her photos, she's pretty talented at that as well.) And Three, as mentioned before, she's super cool.

After getting home from Alt, I started thinking of things I'd like to do this year (resolutions I guess) and on the top of that list I had: paint more for myself and experiment with new recipes and ingredients. You see, I love cooking and before now I never could find a way to bring that love onto the blog. So why not combine those two goals and share the process? And on that note, why not see if one of my super talented friends would like to do this with me? So that's exactly what I did. Luckily for me, Kim was on board!

Here's how it works. Each month we pick an ingredient, make something that uses the ingredient and then create art based on the ingredient or the dish itself. After that, we share what we did with you all! Sounds like fun right? We thought so too.

This month, we chose beets and to be honest, I've never liked beets. I always thought they looked pretty, but I didn't enjoy the flavor. Of course, I refused to tell Kim that when she suggested beets because I wanted to make myself try something new and I knew that she was too nice to make me cook something I didn't like. So I kept my mouth shut and dove in. And guess what? I love beets now. Well, I love roasted beets still working on the fresh ones. Baby steps, right?

And without further adieu, here are the recipes we made. Make sure to head over to Kim's blog and check out her other photographs as well as her take on all of this!

ROOT VEGETABLE AND SAUSAGE RAGOUT WITH CREAMY, CHEESY, GRITS click to print recipe

It started as this recipe from Whole Living, but I rarely follow a recipe verbatim. In reality, I kind of read something I like and then use it as a jumping off point based on what I have in the frig/pantry. This is a good example of that practice. Also, most of my stuff serves 2, because that's how I cook. There was extra here, but I'd double it if you were planning for 4.

Ingredients:

1 large onion

3 carrots

2 parsnips

1 potato (I used purple ones because they are pretty and I had them)

4 Brussels sprouts (halved)

2 beets (fresh ones. Nothing from a can here!)

½ teaspoon of granulated garlic (or finely mince 2-3 cloves of the good fresh stuff)

1 Tablespoon of extra virgin olive oil

14 oz can of diced tomatoes (or you can use a pint of cherry tomatoes if you happen to have them)

1 1/4 cup of low sodium stock (vegetable or chicken)

1 bay leaf

1 teaspoon each of thyme, rosemary, and parsley

½ teaspoon of balsamic vinegar

¼ lb ground sausage

creamy, cheesy, grits

salt and pepper

Directions:

1) Preheat your oven to 475 degrees Fahrenheit

2) Wash all the vegetables and then peel the carrots and parsnips (you don’t have to if you washed them well enough)

3) Dice all of the vegetables into large chunks and place in a bowl. Toss with olive oil and garlic and pour vegetables onto a cookie sheet.

4) Roast for 20-30 minutes, turning the sheet or stirring the vegetables halfway through the cooking time.

5) While the vegetables are roasting, cook the sausage until brown. (I’d suggest using a Dutch oven or a deep pan because later everything has to fit in this.)

6) Add the tomatoes and stock to the sausage and cook for 5 minutes on medium. If you’re using fresh tomatoes, mash them up a little to make more of a sauce.

7) Add the bay leaf, thyme, parsley, rosemary, and vinegar and cook for another 5 minutes.

8) Add a pinch of salt and a pinch of pepper. (You can always add more.)

9) Around this time you should start making your grits*

10) When the vegetables are finished, take them out of the oven (remember to turn off the oven) and pour them into the tomato and sausage mix and cook for another 3ish minutes. (Feel free to cook on low until your grits are done. It won’t hurt it.)

11) Take out the bay leaf.

12) Pour the vegetable and sausage ragout over the grits and serve immediately. Don't be afraid if there is a strong red color when you mix things. That's just beet juice. If that bothers you, roast the beets separately and add them on top of the ragout and grits instead of mixing it all together. I made this on Valentine's Day though, so it was kind of appropriate.

Side note about the grits:

I eat grits because I am from the South. If you aren’t, or if for some odd reason you don’t like grits, this would work with polenta too. To make them super creamy and cheesy and awesome, use half and half instead of water to make them. Add more than the package tells you to- you’ll kind of want to cook it like risotto in the fact that when it start drying out, you’ll add more half and half. In the end you’ll probably almost double the amount of liquid called for in the grit directions. As for the cheese, just mix is a large handful once they are finished cooking and then season with salt and pepper. (Grits ALWAYS need salt. Do not be afraid of adding salt.)